|
Used to setup routes used for data collection on a PDA. |
 |
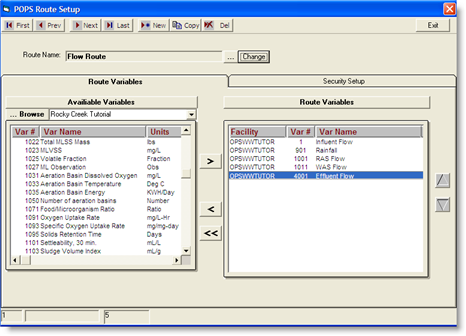
BUTTONS:
 |
Scrolls to first route created |
 |
Scrolls to previous route |
 |
Scrolls to next route |
 |
Scrolls to last route |
 |
Creates a new route |
 |
Copies selected route |
 |
Deletes selected route |
 |
Exits out of Route Setup |
 |
Opens a browser to find a route to edit |
 |
Select to change name of selected route |
 |
Browse current routes |
 |
Shifts single or multiple variables from Available Variables section to Route Variables section |
 |
Shifts single or multiple varibales from Route Variables section to Available Variables section |
 |
Shifts all Route Variables section to Available Variables section |
 |
Moves selected Route Variables up in the list |
 |
Moves selected Route Variable down in the list |
Example:
Step 1: In OPS SQL go to the main menu bar and click on Pocket OPS, Route Setup.
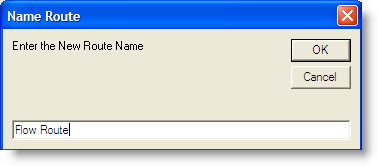
NOTE: No routes exist at this time so a window will come up asking you to enter a name for the new route. If a route does exist, just click on the  button to create a new route. A window will open for you to name this route. Type the name you want in the box.
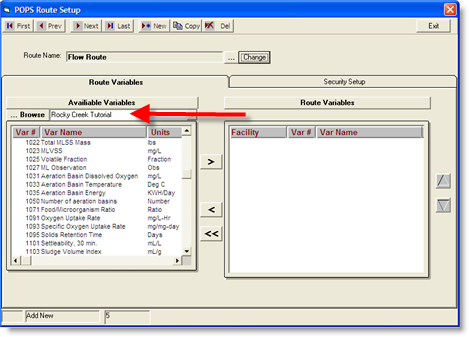
Step 2: Choose a facility for this route
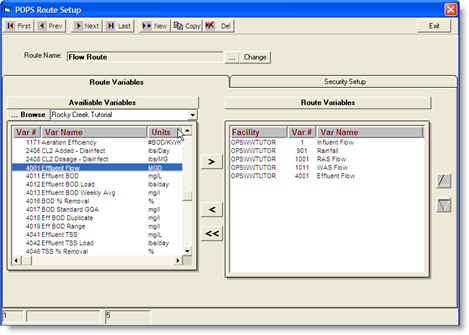
Step 4: Select your variable(s) from the Available Variable List and move them to the Route Variable list.
Step 5: (OPTIONAL) You may set the permissions for the route by clicking on the Security Setup Tab.
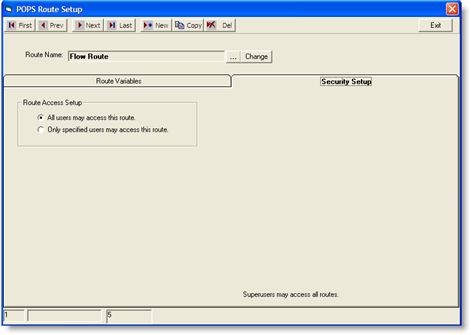
Select either:
A. All users may access this route. This option allows everyone that logs into the handheld to access the route.
B. Only specified users may access this route. This option allows only super users and selected to access the route. The security setup window allows you to choose specific users from your user list.
You can design as many routes as required. When you Sync Pocket OPS, you will be able to choose which of your routes will be sent to the handheld. The handheld user can then use any route that was synced (with proper rights) to collect data.
OPS SQL will automatically save this route when you exit this window.