TOOLBAR

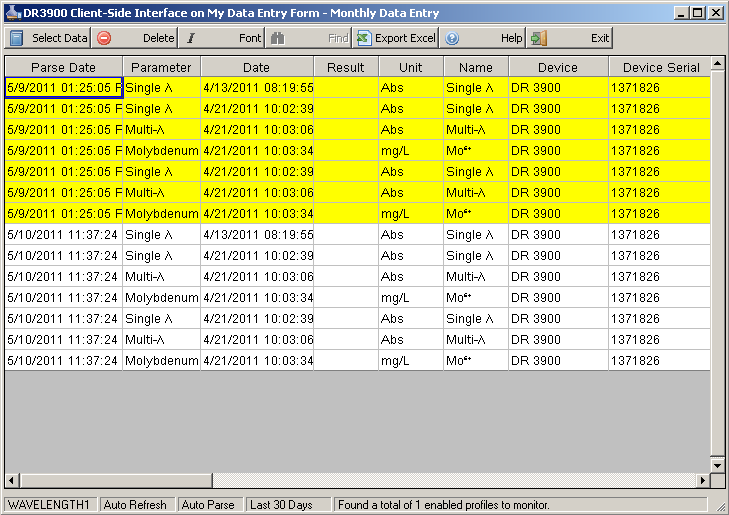
 Select Data: The Select Data button will return your current selected data. If you are in free mode, you it will return the select cell. If you are in Data Column Mode, it will select the data in configured data column of the selected row.
 Delete: You can delete any number of data rows you like from the DR3900/DR6000 Client-Side Interface. This operation is reserved for users with SUPER user privledges only. When deleteing data, you will be asked if you are sure you wish to delete the data. Selecting Ok will permanently delete the data.
 Font: This button will allow you to change the font size displayed in the form. Currently will ignore settings to change the font face or font style (bold, italics, etc)
 Find: Find will allow you to search currently displayed data for certain terms. Currently disabled!
 Export Excel: You may export this forms data to an excel sheet. The sheet will be exported to a folder called Export under your Application directory. The file is named: CSI_METADATA_[USER]_[ID]_[Date]_[Time].xls
 Help: Opens the help file to view help on this form.
 Exit: Exits the window.
STATUS BAR

 Default Data Column: This specifies the column that will be used when selecting data in Data Column mode. You can double click here to toggle between Data Column Mode and Free Select Mode.
 Auto Refresh: This displays whether the form is refreshing it's data frm the database when new data has been parsed. You can double click here to toggle auto refresh on and off.
 Auto Parse: This form is responible for parsing data. You can toggle parsing on and off by double clicking this.
 Displaying Data Date: This displays the default days to go back when populating this form with data. This can be changed in settings.
 Parsing Status: This section displays the status of parser. You can also find all status messages in the log file.
The DR3900/DR6000 Client-Side Interface Window
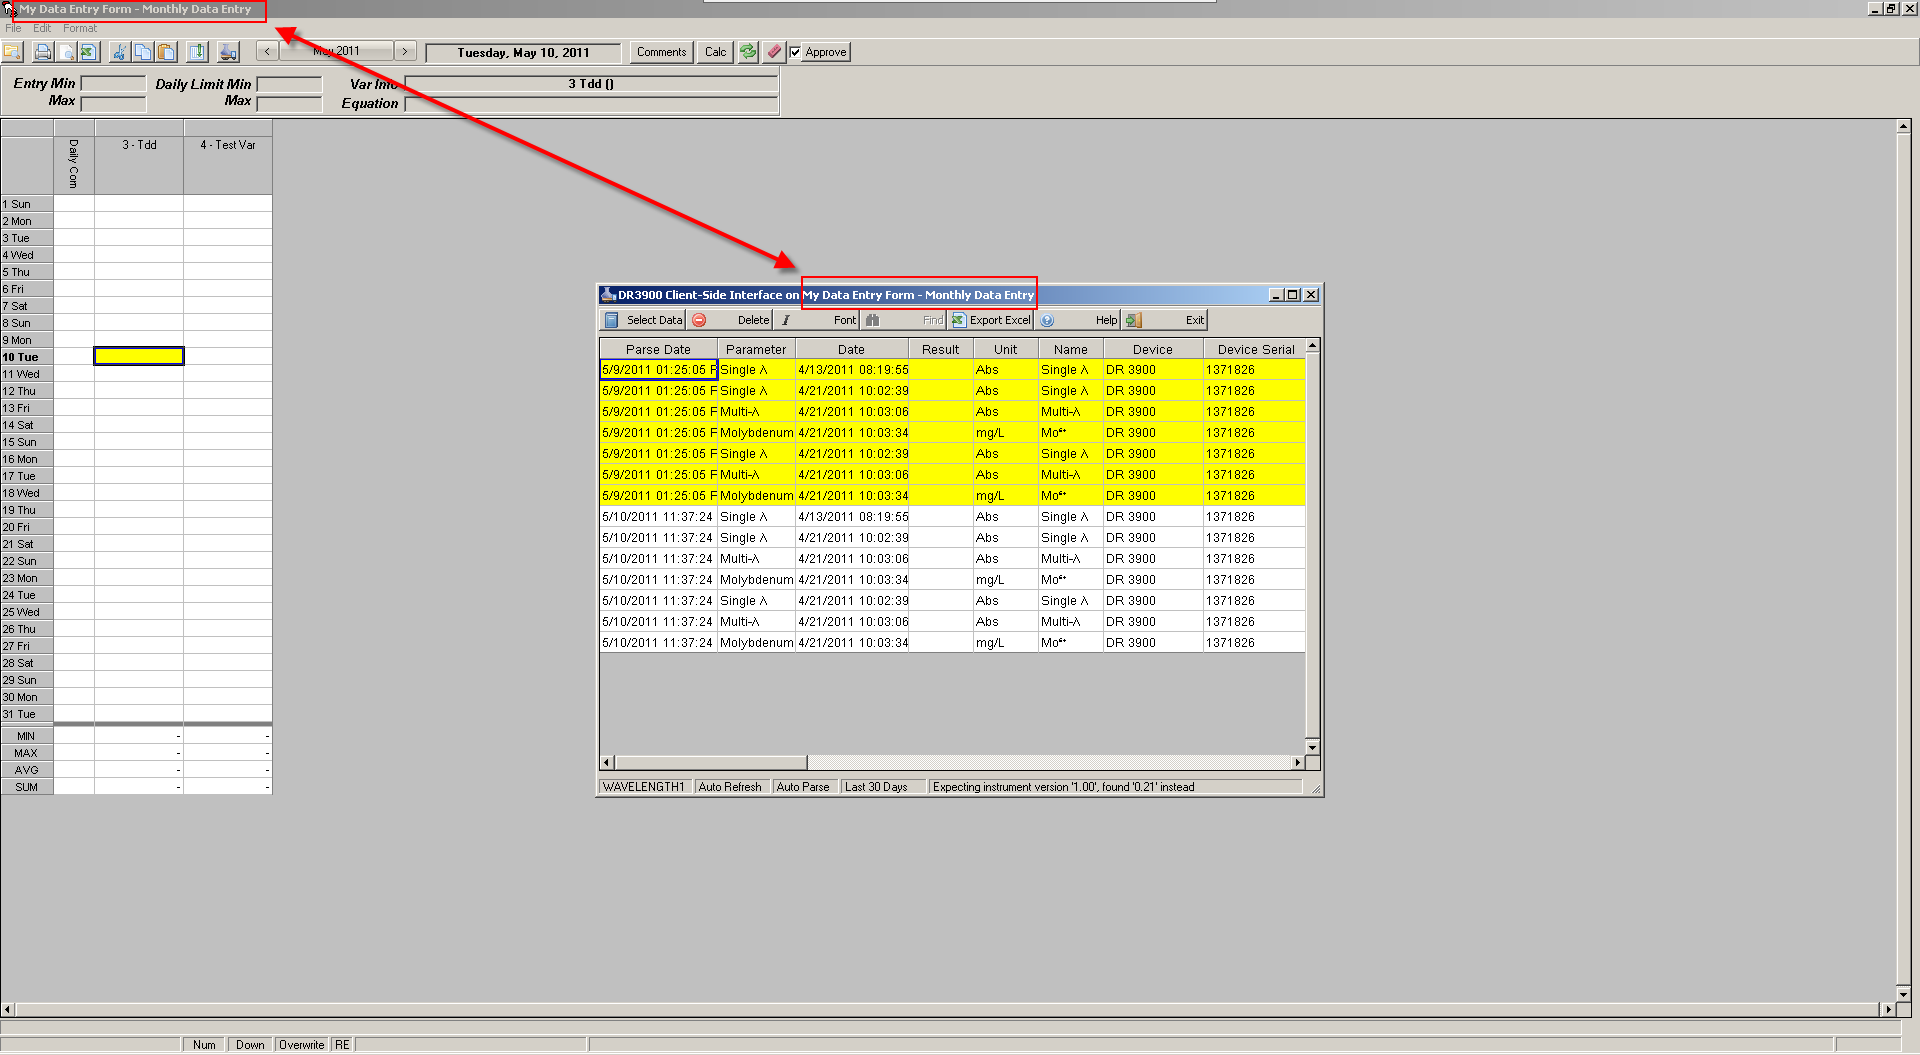
This window is a floating window. This means that once you open the window, you can keep it open as you change between various other windows that it can interact with. This window can interact with Monthly Data Entry, Custom Data Entry, Weekly Entry, and any Daily Detail Entry forms.
Opening the Form
Each of the windows that can interact with this form can also open this form. You can right click on an entry point and choose "DR3900/DR6000 Client-Side Interface". You can also click the toolbar button for the interface  .
.
DR3900/DR6000 Client-Side Interface Window Context
This form is floating but contains a context to the entry form it will attempt to push data to. This context is part of the title bar. As you leave this form open and move to a new entry form, you will see the title bar change to reflect which entry form it is currently associated with. This is called the window's context.

Reading New Data
When the form opens up, it attempts to read in new data based on configured profiles. Since this form maybe opened on multiple machines, the path the files must match otherwise the form will not be able to read in new data. The Form will let you know if it runs into any issues while reading data via the status bar and log files.
As new files arive, the form will automatically attempt to parse that data file. You can turn this off by double clicking the Auto Parse status bar location  .
.
Once the data has been Parsed, it is put into the database for all other client machines to use. Each Client machine that has this form open will periodically check the data base for new entries. This functionality can be turned off by double clicking the Auto Refresh status bar location  .
.
Selecting Data
Once the form is open, you can select data out of the form to use in your entry form. There are two modes to selecting data: Free mode and Data Column mode. The form opens by default in Data Column Mode. When you select data in Data Column Mode, the form will use the "Default Data Column" to select data. This means that no matter which cell you select, it will always get data from a certain column in that same row. In free mode, you can select which ever individual cell you like. You can switch between each mode by double clicking the first status bar location which contains the name of the Default Data Column  .
.
You can select data by either clicking the Select Data toolbar button  or double clicking on the form.
When you select data, the form will give the data to entry form you have currently open. It will attempt to push the data to currently select entry cell. If that cell cannot accept the data, no data will be written.
Once you have selected a certain data point, the row will turn yellow. You may still select this row for data. The yellow is only to inform the user that they have used this data before. If you select the data but the form cannot use the data, the row will still turn yellow since it has no way of knowing what the entry form is going to do with the data it passes to it.