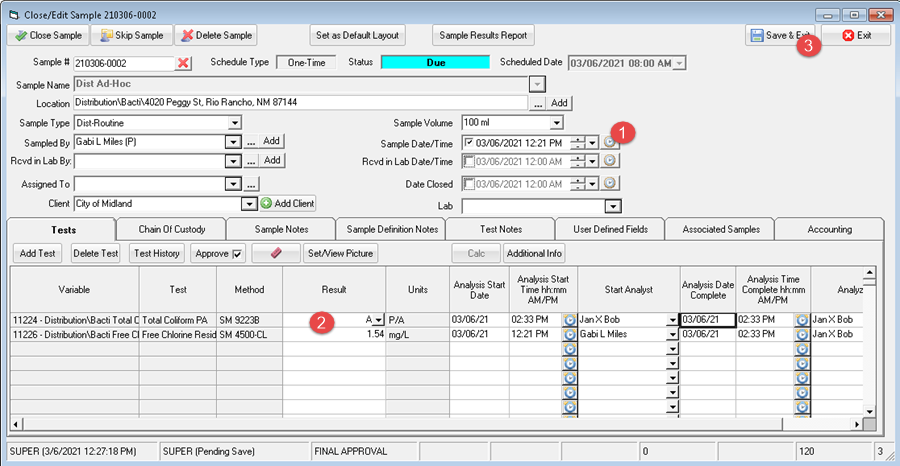
Lab Cal allows a sample to be defined as ad hoc. An ad hoc sample is typically used when the location for the sample is not known until the sample is taken. When a sample is marked as ad hoc, Lab Cal allows you to create the Location when entering data (thru Close Sample, Receive Samples, etc...). The location will be setup as ad hoc also and NOT show up in the variable browser.
Example: Bacti Distribution Sampling
Your distribution sampling sites are not defined (they may be taken by another municipality and you simply get the address on the Chain of Custody). Therefore you cannot setup the locations/variables as you don't know the locations. We will use the ad hoc sample method to handle this.
General Steps:
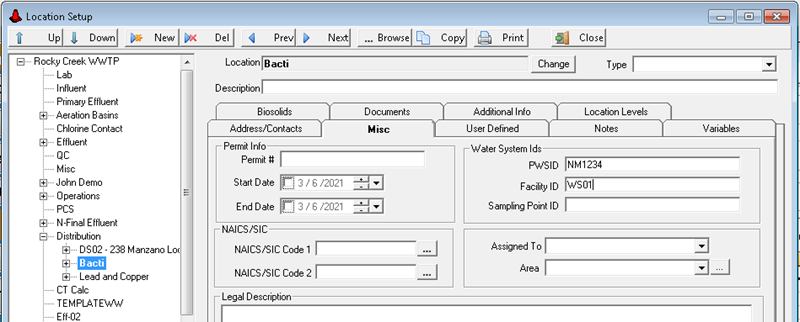
1. Setup a parent location where your ad hoc locations will be children of.
2. Setup minutely (or 5 minute) variables for the analytes in the sample.
3. Setup one sample for Bacti Distribution with the analytes connected to the variable in step 1. Mark the sample definition as ad hoc.
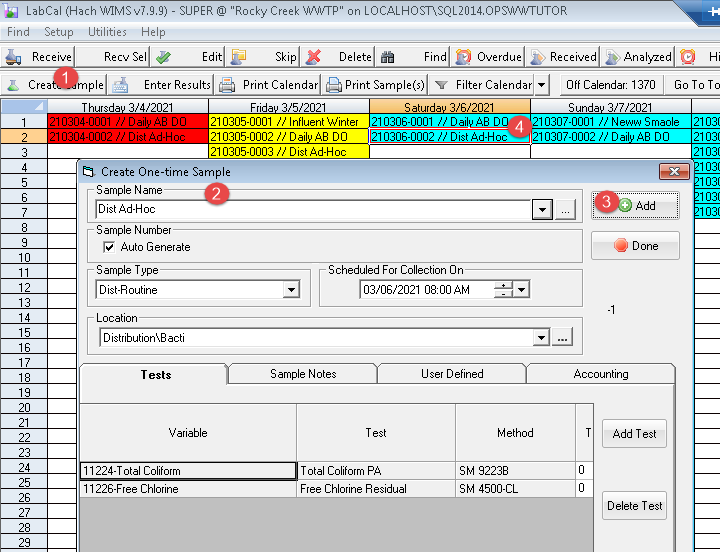
4. When receiving a sample, use create sample or in receive sample use the create button and create the ad hoc sample.
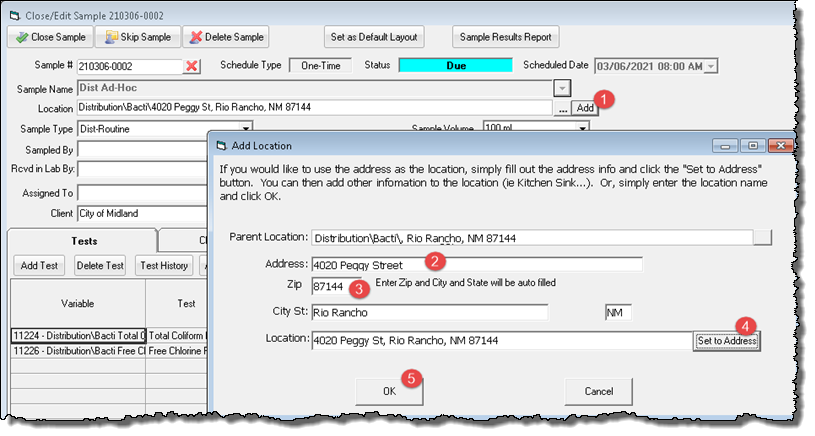
5. Use the Add Location button and enter the location/sample point information.
6. Enter your results and close the sample.
Step 1: Setup a parent (catch-all) location
Step 1: Setup variables for the sample:
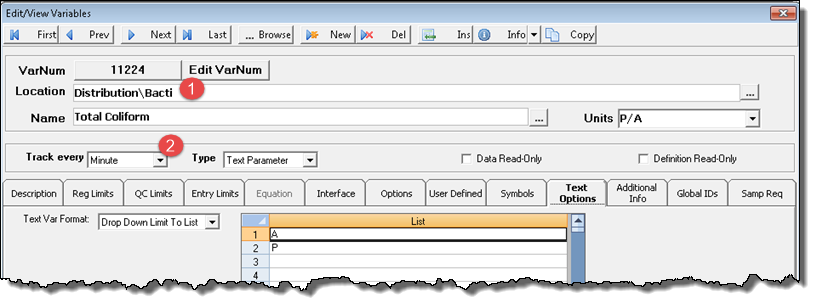
1. Assign to a "catch-all" location. All your new ad hoc locations should be assigned (i.e. this is the parent location) to this location.
2. Set Track every to Minute. This allows samples and data to be stored for each minute. NOTE: If a sample is received for the same minute, the second sample will be placed in the next minute. IE First Sample is Sampled at 8:00AM, the second sample when set to 8:00AM will automatically be moved to 8:01AM.
Step 3: Setup the ad hoc Bacti Distribution sample
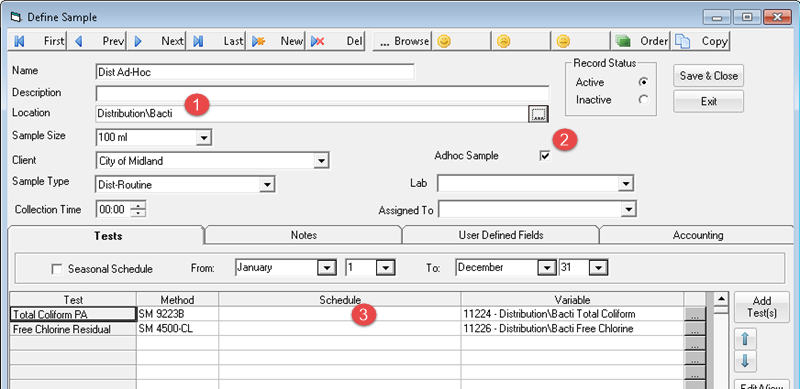
4. Create sample
5. Use the Add Location button and enter the location/sample point information.
6. Enter your results.
