In order to downgrade an OPS SQL database from MS SQL Server 2005 to MS SQL 2000 (or MSDE):
1. Create an OPS SQL database using the OPS Server Setup program
2. Upgrade the db by logging into in OPS SQL to make sure it is the same OPS DB version
3. Get into Microsoft SQL Server Management Studio
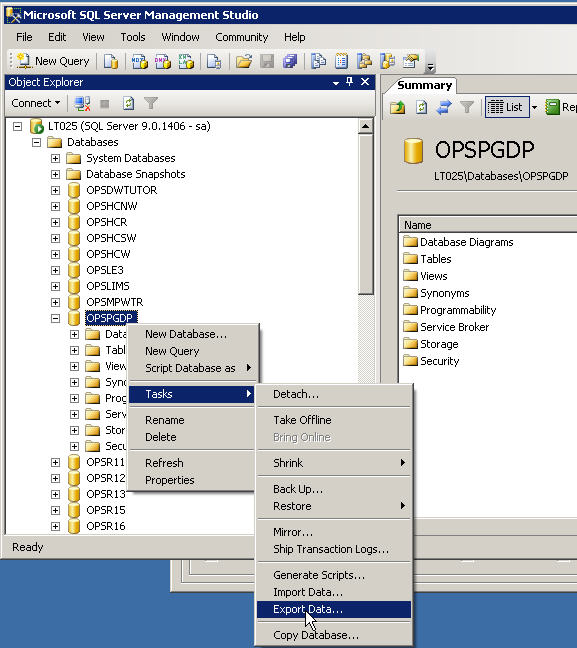
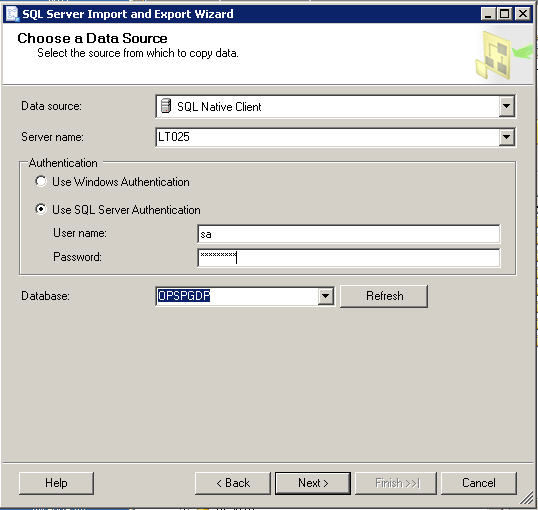
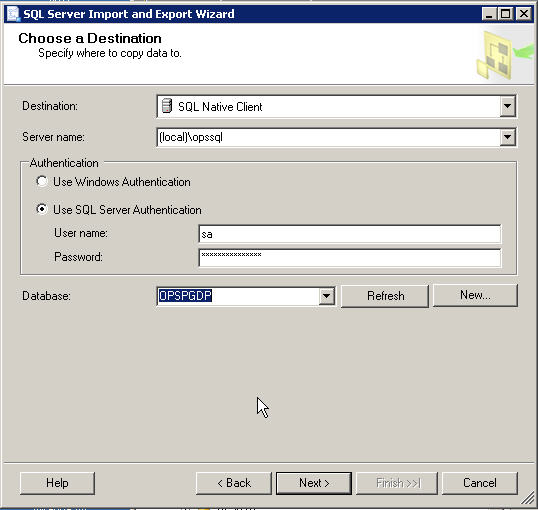
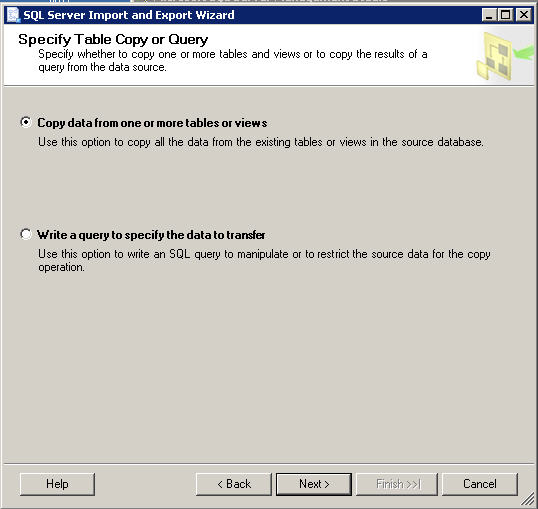
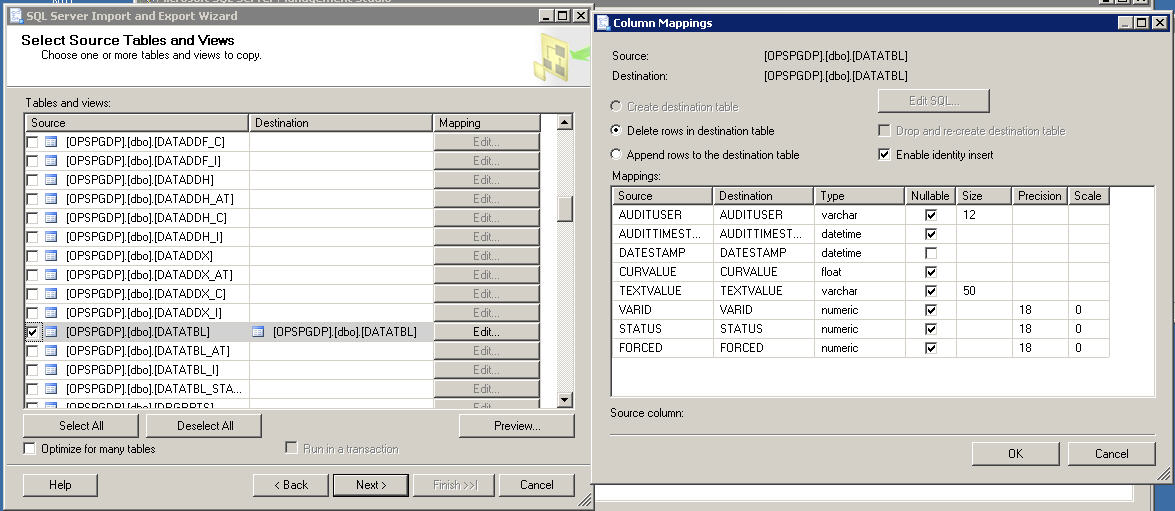
For each table you want to transfer, check the box and then click the Edit button. Select the Delete rows in destination table AND Enable identiy insert. Note: only do about 7 tables at a time as there seems to be a problem if you do more than that at one time. So repeat process for all tables you need to transfer.
The article below can be ignored as it shows more detail if you are intrested:
Before beginning I must assume, firstly that the user, who will attempt such thing, has a basic knowledge of SQL Environment, secondly that he has the two versions already installed (both 2000 and 2005), that a basic backup of the databases has been created and finally that all the 2005 SQL Server Users have been created at the SQL Server 2000 environment as well.
Step 1 Generating Scripts for the Database Elements and Structures
1) Right-click over the desired Database at 2005, Choose Tasks and the Generate Scripts (Option).
2) At the pop-up Dialog Box click at the Script All Objects in the selected Databases check box, to activate it and then Click the Next Button.
3) Set the following Elements to the following Values
a. Script Collation , set to TRUE
b. Script Database Create, set to TRUE
c. Script of SQL Version, set to SQL SERVER 2000
d. Script foreign keys, set to FALSE
e. Script Triggers, set to FALSE
Then Hit the Next button
4) Select the way the generated scripts should be saved (There are different selections. The most common one is Clipboard). Finally click the Next button till you reach the end.
5) Click Finish
After completing this procedure, we have to move to the SQL SERVER 2000 environment. Here, by using the Query Analyzer, we will have to run the scripts that were generated using the master database. Copy and Paste the script at the Query Analyzer and run it. After that the Structure of the Database will be created.
Be careful, the SQL Server 2005 Edition inserts the Views in a random place through the script. Therefore, all the scripts that are referred to the Views MUST be moved to the end of the script. If the Query Analyzer shows some errors do not be bothered. Delete all the elements created from the script and after you fix the code run it again.
Step2 Moving the data from 2005 to 2000
1) After completing the previous step successfully, moving the data follows. Right-click at the 2005 database you used to run the previous step and select Tasks and then choose the Export Data (option).
2) From the pop-up Dialog Box, select the Source Db and Click at the Next Button.
3) At the next step you will have to choose the destination server and the destination Database for the Data to be exported. Then Click Next.
4) A List of all the Source Database’s Elements will appear in the screen. Select one by one all the Elements you wish to move and for each one click at the button Edit Mappings (Located at the bottom right corner of the Dialog Box just under the Elements list). A new Dialog box will pop-up. Select the Delete rows in Destination Tables option and activate the Enable Identity Insert Option. (Remember to repeat this action for each of the selected Element from the list that will be moved.
CAUTION!!! A malfunction of the SQL Server 2005 has been found. Not sure why, after multiple tries I have observed that when I tried to move more than twelve Elements at once, the Export Data Wizard of SQL Server 2005 seemed to disable the Enable Identity Insert Option that was activated over the Edit Mappings Dialog Box. But if the number of the selected Elements is smaller than 12 no problem seemed to appear.
Step 3 Generating Scripts for the Database Foreign Keys and Triggers
Finally, to successfully finish the downgrade of the Database, the Triggers and the Foreign Keys of the DB must be produced. The procedure that should be followed is the one stated next:
1) Right-Click at the SQL 2005 Database and Select from Tasks Menu the Generate Scripts Option.
2) Using the pop-up Dialog Box make sure that the check box Script All Objects in the selected Databases is not enabled and hit the Next Button.
3) Set all the Elements on the List to a False Value except the ones that follow:
a. Include IF NOT EXISTS , set to TRUE
b. Script Owner, set to TRUE
c. Script of SQL Version, set to SQL SERVER 2000
d. Script foreign keys, set to TRUE
e. Script Triggers, set to TRUE
Then Hit the Next button
4) After finishing reading the Elements of the Database, a new list will appear at the Dialog Box. Make sure that you select ONLY THE TABLES of the Database and hit the Next Button.
5) At the screen that follows hit the Select All button and the Next.
6) Select the way the generated scripts should be saved (There are different selections. The most common one is Clipboard). Finally click the Next button till you reach the end.
7) Click Finish Button.
After completing this procedure, we have to move to the SQL SERVER 2000 environment. Here, by using the Query Analyzer, we will have to run the scripts that were generated using the master database. Copy and Paste the script at the Query Analyzer and run it. After that the Foreign Keys and the Triggers of the Database will be created.
After these steps the database should be fully functional under the SQL Server 2000 edition.