The easiest method to migrate OPSSQL to a new machine is using a backup(you do back up OPS right?) of the original database and restore the facilities on the new machine. This article will assume that the original machine is up and running and that we still have access to OPS and its files and that the new machine is also setup.
NOTE: This article applies only to Express and Lite editions of OPS SQL. Other editions cannot be migrated based on intructions below.
1. First you will need to generate a backup on the original machine by clicking System Setup->Admin Console while in OPS. Then click on the Action Scrips tab. You can now click on Execute! just to the right of "Requests backup of the whole OPSSQL system".
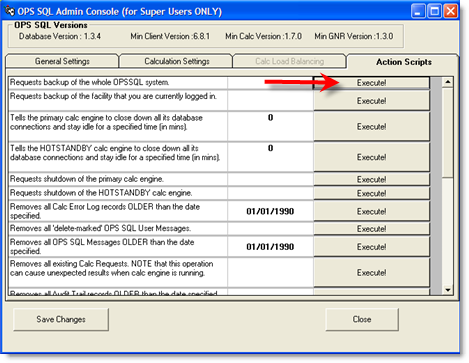
It will prompt you about 3 times so click OK on each one. Now close out of the Admin Console.
2. When the backup is complete you should see a new message in your OPS SQL Inbox stating that the backup was successful. Close out of OPS.
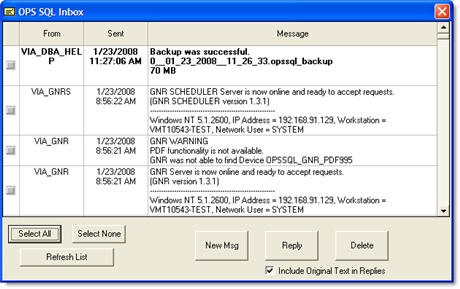
Now you need to copy the newly created backup file and a few select folders from the OPSSQL install folder to a removable media to transfer to the new machine.
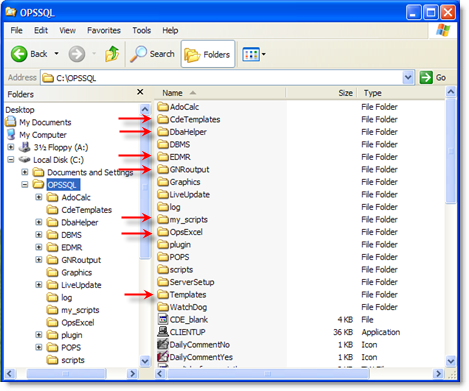
3. Right click Start then click Explore then navigate to your OPSSQL install directory(typically C:\OPSSQL). The DBaHelper folder contains another folder called Backup which holds all of the OPS database backups. Copy this folder to a removable storage device such as a CD-R, flash drive, external hard drive, or network drive that the new machine will have access to. The CdeTemplates, EDMR, my_scripts, OpsExcel, GNRoutput, and Templates folders all contain files which may have been generated by OPS that are not part of the database that you can back up optionally as well.
4. Install OPSSQL on the new machine normally.
5. Copy the folders you backed up earlier in this article onto the new machine in a folder of your choosing. Lets pick C:\OPSBACKUP for example.
6. From this new folder(C:\OPSBACKUP) copy all of the folders into the new OPSSQL installation directory(C:\OPSSQL). It should look like the screenshot above with an extra Backup folder.
7. On the new machine Click Start->Programs->OPSSQL->Server Setup. This will launch the OPS Server Setup. Click NEXT twice then input your username and password(likely super/super). Click the tab labeled Restore Console.
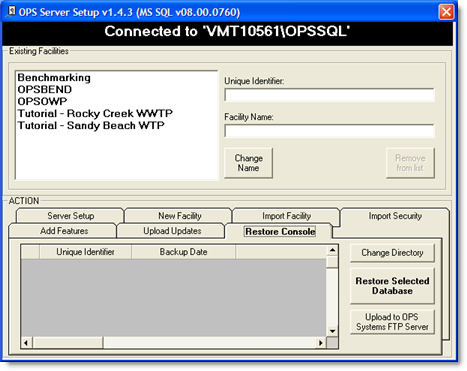
8. Click the Change Directory button and navigate to C:\OPSSQL\Backup. Click on the backup file for the latest date then click OPEN.
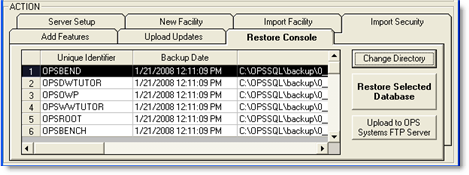
9. We now have to restore each facility one at a time starting with OPSROOT. Click on OPSROOT and click Restore Selected Database. Click OK in the window that comes up and wait for the restore to complete. Do the next one in the same way. Note, OPSWTUTOR and OPSWWTUTOR are the tutorial databases that come with OPSSQL and do not need to be restored.
10. When you complete the restore process close out of the server setup screen and log into OPS and test the function of each facility.