|
Custom Data Entry (CDE) forms are used to enter/review data. Forms can be designed to match existing paper forms, benchsheets, etc... to be entered/reviewed through user defined forms. |
 |
 |
USING:
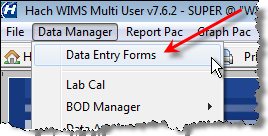
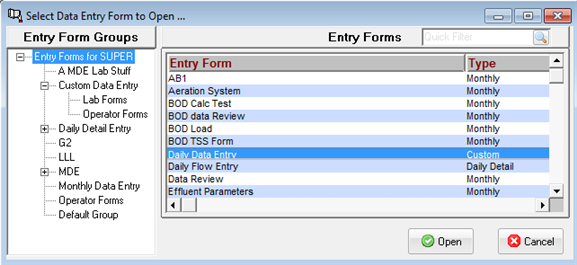
1. Open a form using Data Manager, Select Entry Form to Open.
2. Enter numbers in cells. Hint: After entry, press enter with auto advance on you will be moved to the next data entry cell (white cell).
3. Click Save
4. Change Date/Time and click Go to load and enter/edit data for a different date.
See Also: Calculated Vars Limit Notifications, Custom Data Entry Design
Understanding the Date/Time of the form:
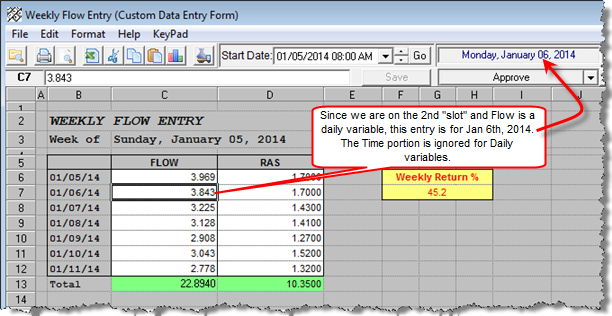
The Start Date of the form sets the "starting point" for the data. Forms can be designed to enter data for multiple data slots for a variable. For example, we can design a CDE form to enter our daily flow totals for a week or enter our hourly pH readings for 24 hours. The first daily value will be for the start date, 2nd daily value for the Start Date plus one day, etc... For the hourly form, the first slot will be for the Start Date/Time Hour, 2nd slot will be for the Start Date/Time plus one hour, etc...
Example: Daily variables for a week with a Start Date set to Jan 5th 2014 at 8AM
Example: Hourly variables for a day with the Start Date set to Jan 5th 2014 at 8AM:
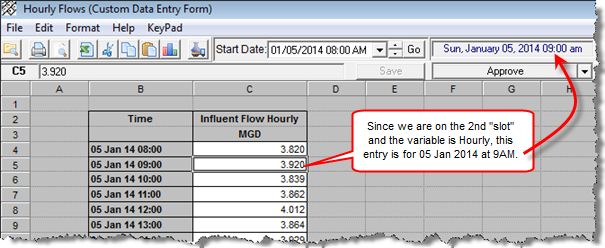
When the form is launched from the menu, it loads yesterday at midnight or today at midnight depending on the default date for Custom Data Entry Forms setting. If launched from a dashboard button, the button setting determine what date/time is loaded.
TOOLBAR:

RIGHT CLICK MENU:
The right click menu gives you access to variety of functions. Click here for more information on using the right click menu.
UNDERSTANDING THE CELL FORMAT
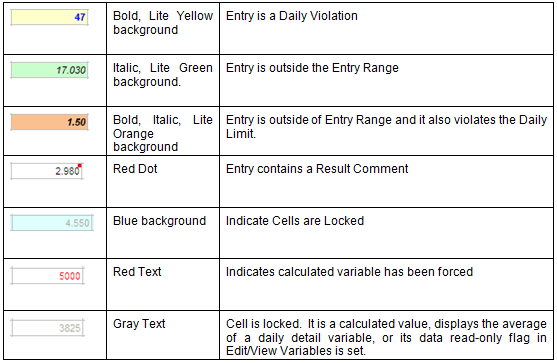
CDE displays information about the entries in the status bar and by the format of the cell. The following describes the different formats and their meaning:
STATUS BAR:
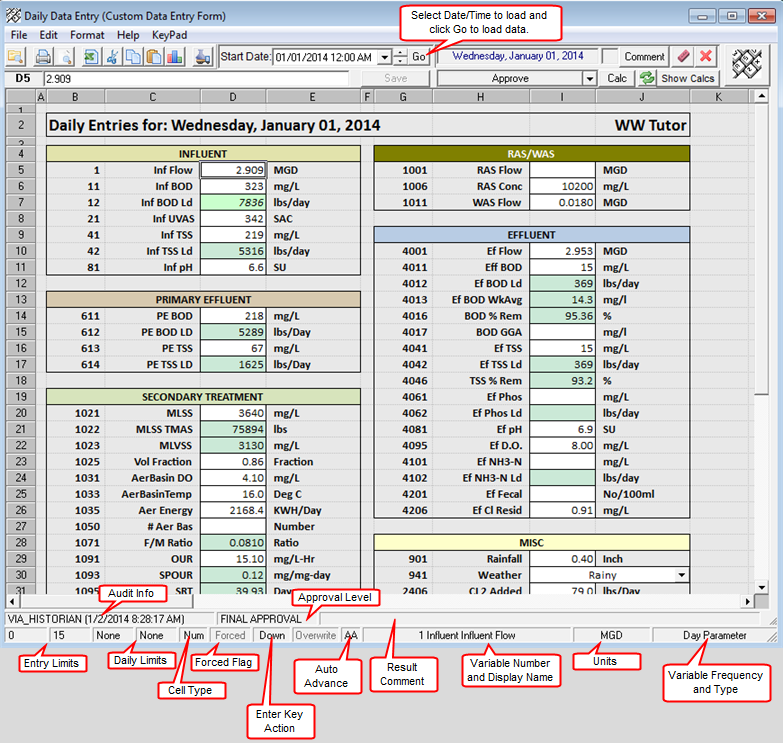
The Status bar at the bottom of the form displays information about the current cell. Each panel of the status bar is explained below.

Last Edit by/time: Displays the Username and datetime of the last edit for the current value.
Data Approval Level: Displays the data approval level of the current value.
Result Comment: Displays the result comment for the variable. Double click this panel to edit or add a sample comment.
Cell Type: Displays whether the current cell will accept numeric data only (Num) or text data (Text). Note: if a variable has been setup to allow the <, >, or ND entries the cell type will be Text.
Enter Key Action: Status of the action that is performed when the Enter key is pressed. A setting of Down will cause the cursor to move down when the Enter key is pressed. A setting of Right will cause the cursor to move to the right (or across) when Enter is pressed. Double Click on the panel to toggle this setting.
Edit Mode: Displays whether data will be overwritten or appended to when typing in a cell containing existing data. Double Click on the edit mode panel to toggle the setting.
Auto Advance - If on (not grayed out) this feature causes the cell selector to advance to the next data entry cell (next cell with a white background) each time the user presses the enter key.